Novactive eZ Slack Bundle
Installation
Installation steps
There are 2 phases:
- Create the Slack Application for your workspace.
- Install the Bundle and configure it according to the Slack application.
Slack Application
First you need to create a Slack app here: https://api.slack.com/apps
Once created you need to go through some steps to connect it to your eZ Platform, you should see this screen.
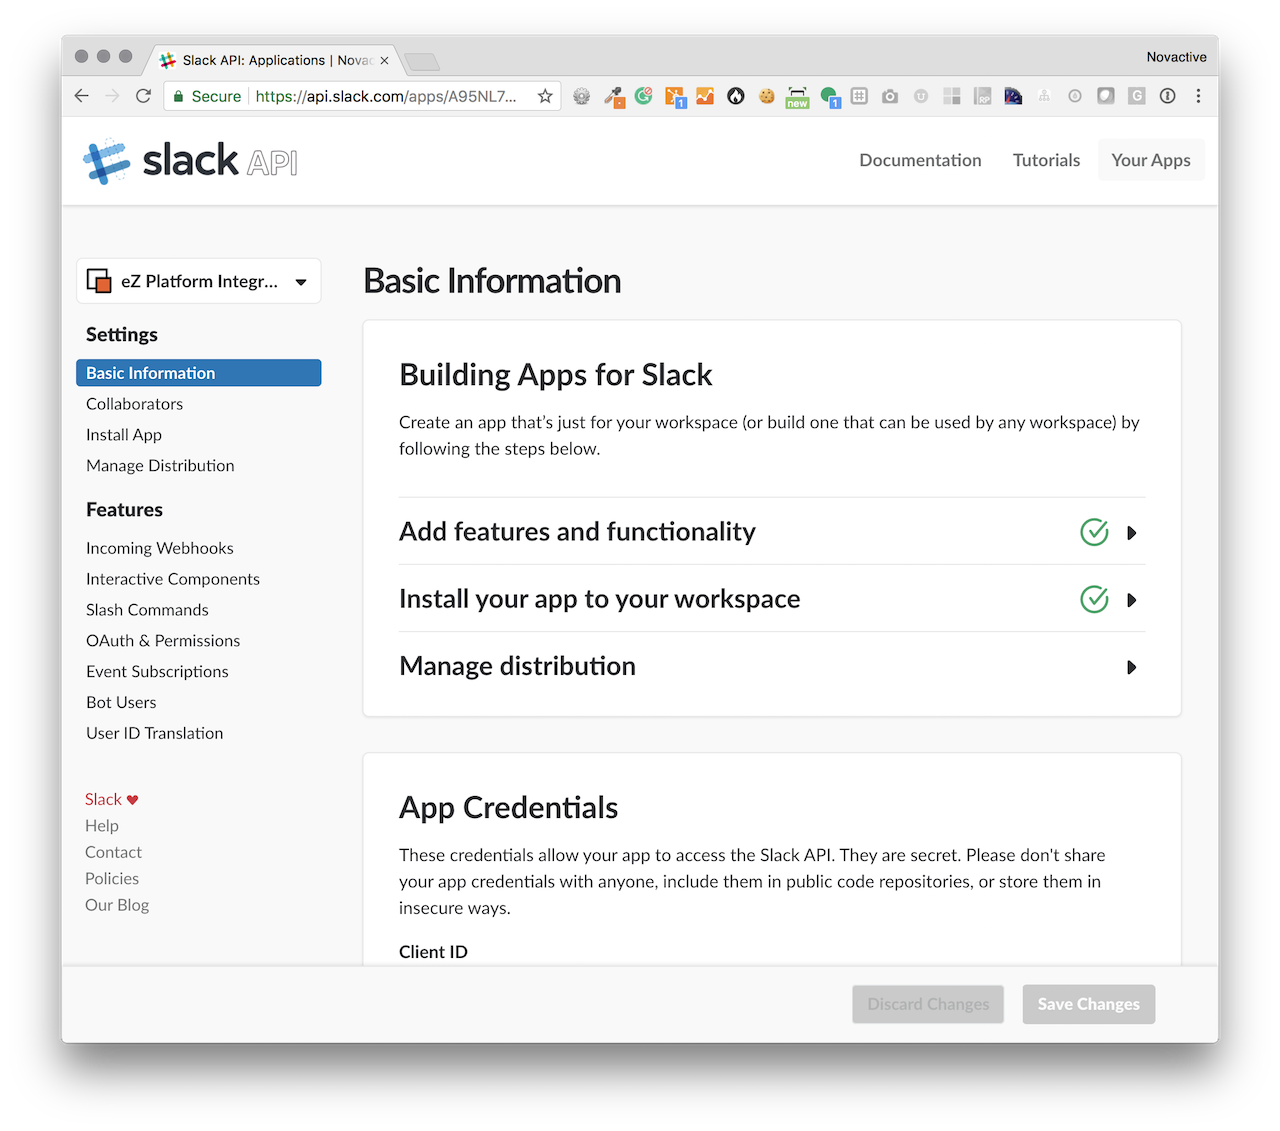
Let's go on the first item in the middle of the page "Add features and functionality".
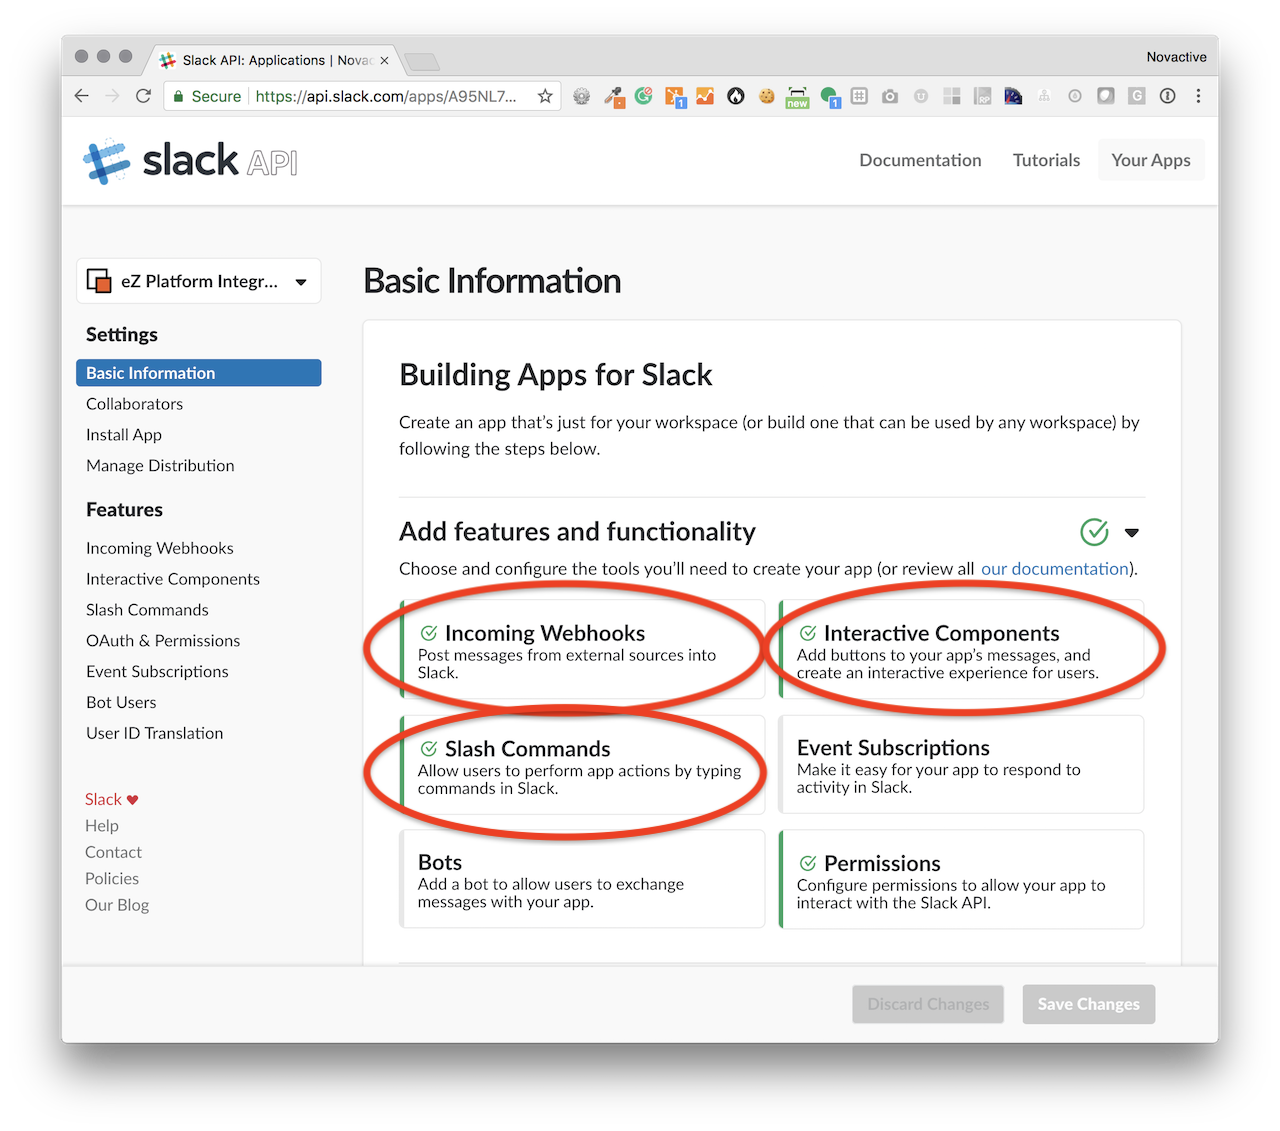
You will have to do something in each of this circled items above.
Incoming Webhooks
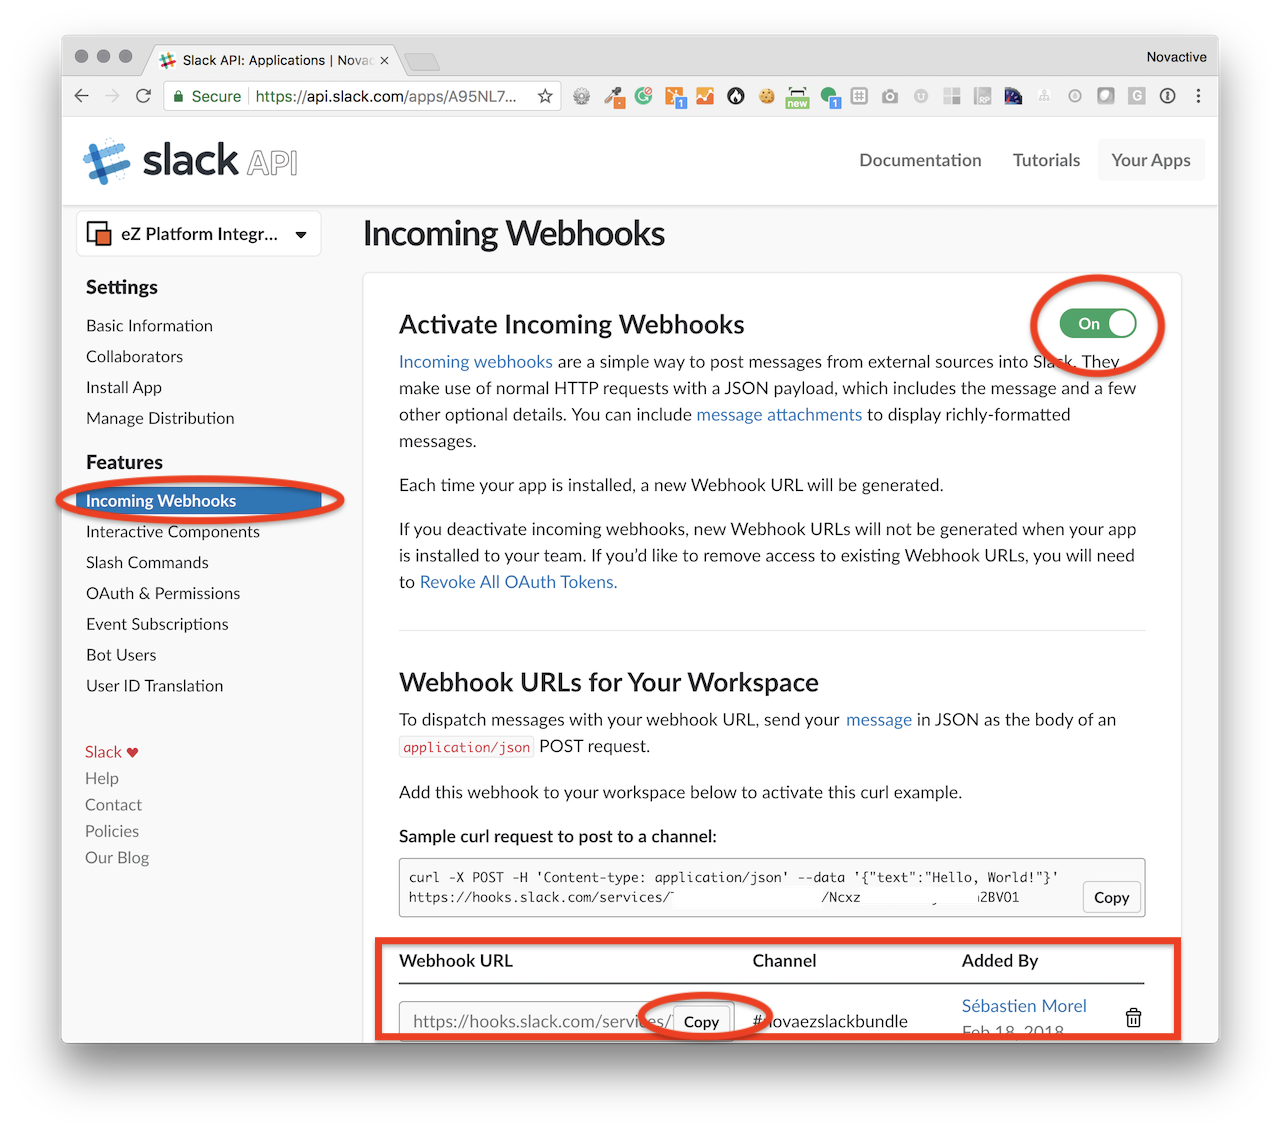
That is basically here that you are going to configure how eZ will be able to send Message in your channel(s).
1 webhook == 1 channel, of course you can create multiple Incoming Webhooks and setup the bundle to send Message
in each of them.
Config in the notifications.channels array
Interactive Components
On the left select "Interactive Components" and provide an URL to your website(a callback). That is the first URL on which
Slack will communicate with eZ.
Just change the "HOST" in the following, this bundle provides the routes, you should fill in something like:
https://HOST/_novaezslack/message
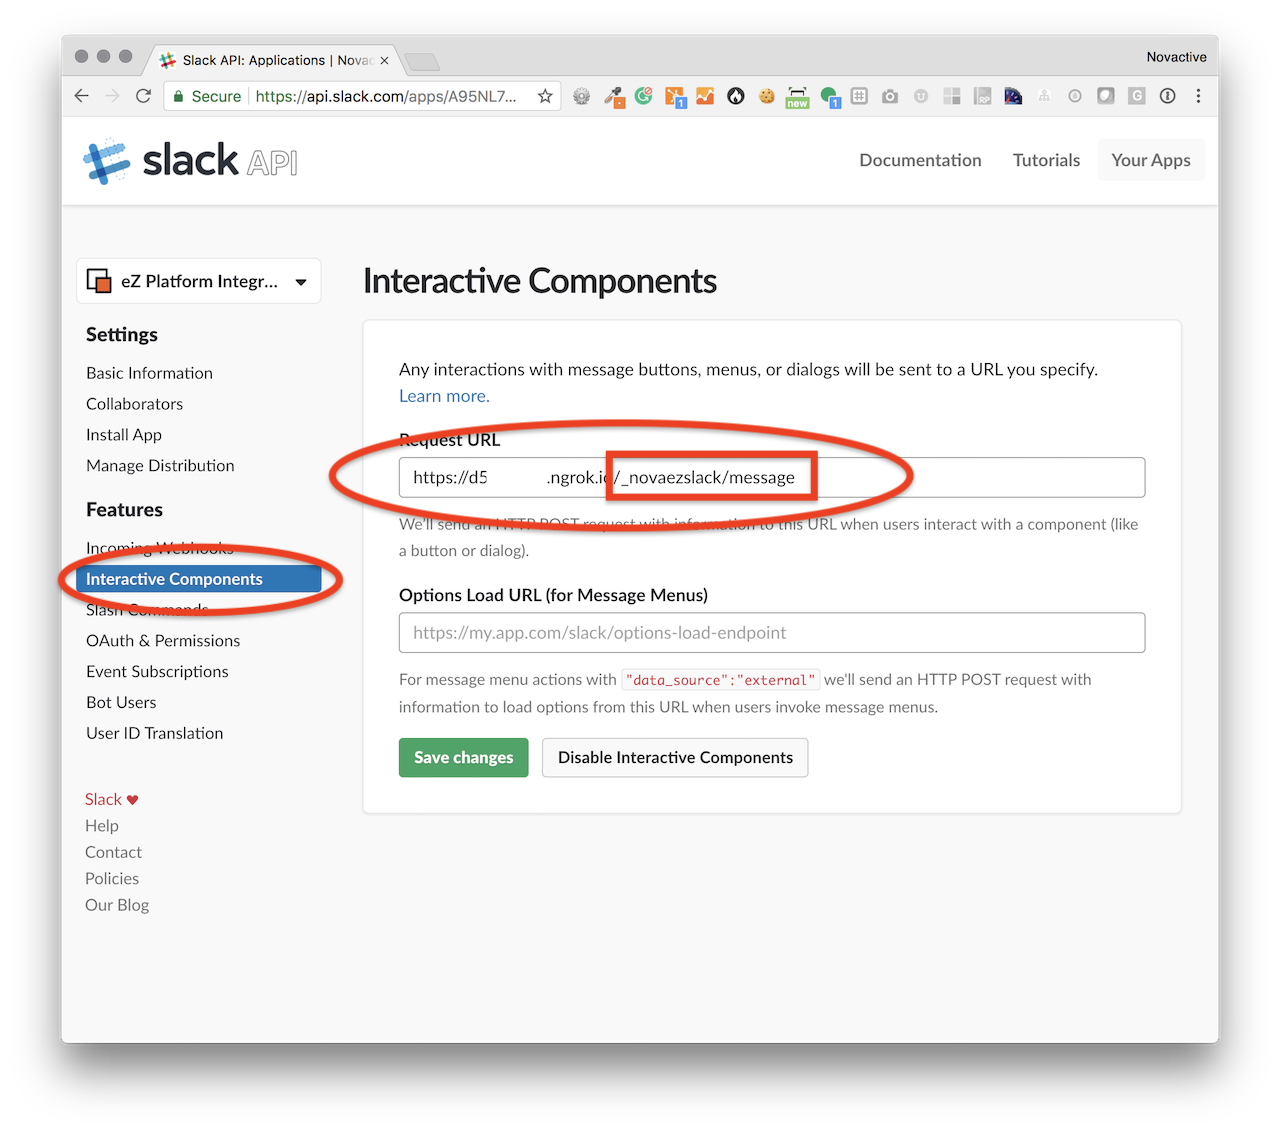
keep the /_novaezslack/message suffix that is mandatory.
Slash Commands
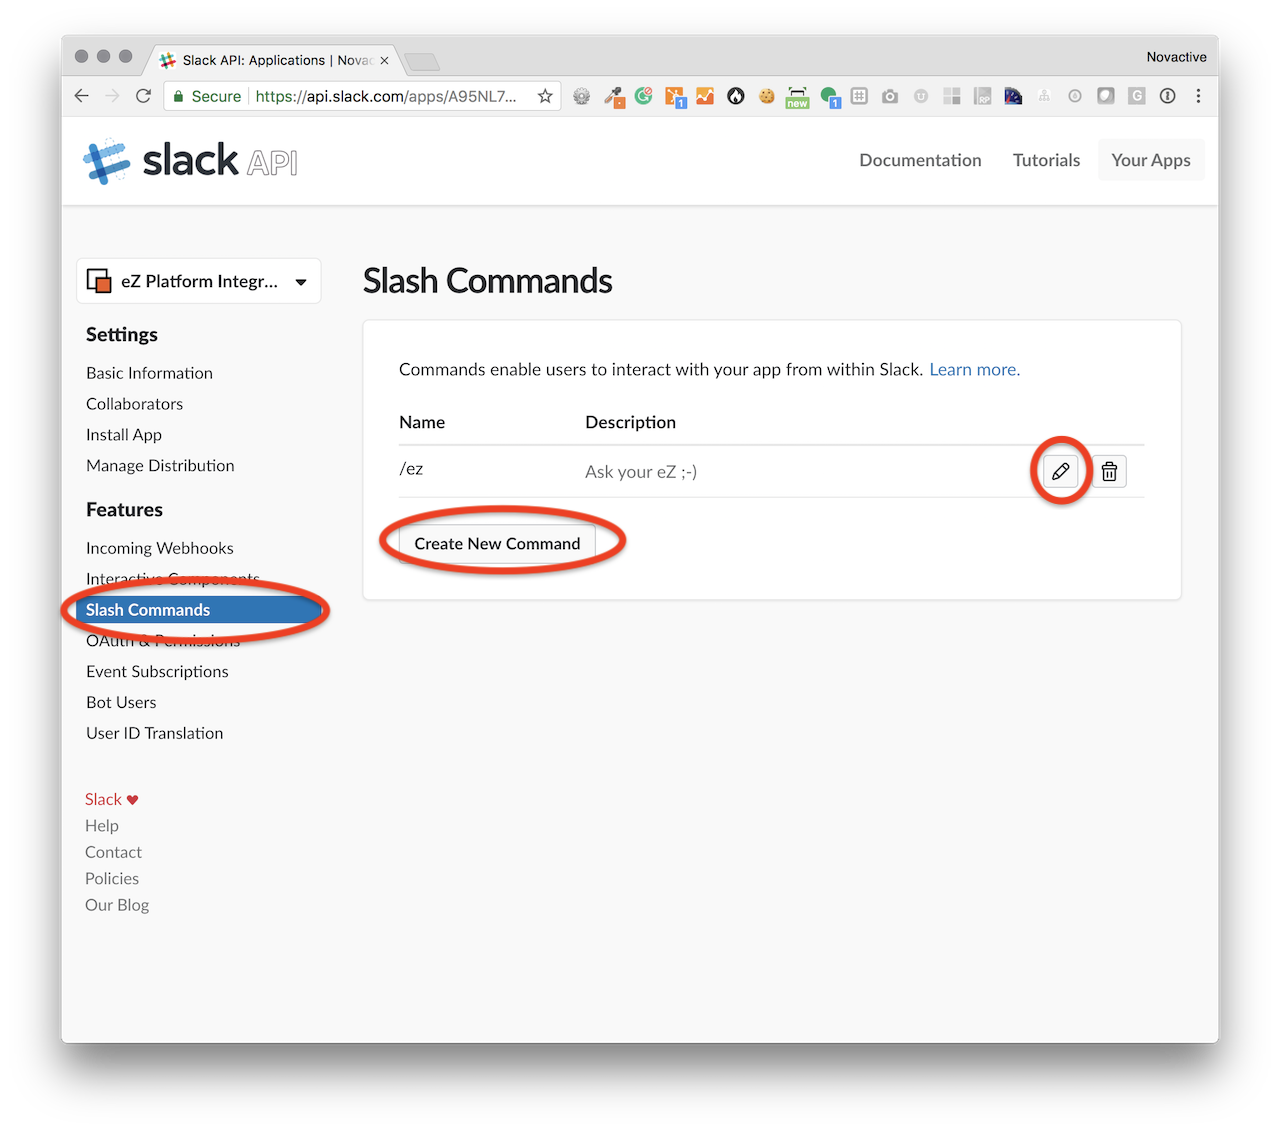
Still on the left "Slash Commands" and provide an URL to your website(a callback). That is the second URL on which Slack
will communicate with eZ (for Commands this time).
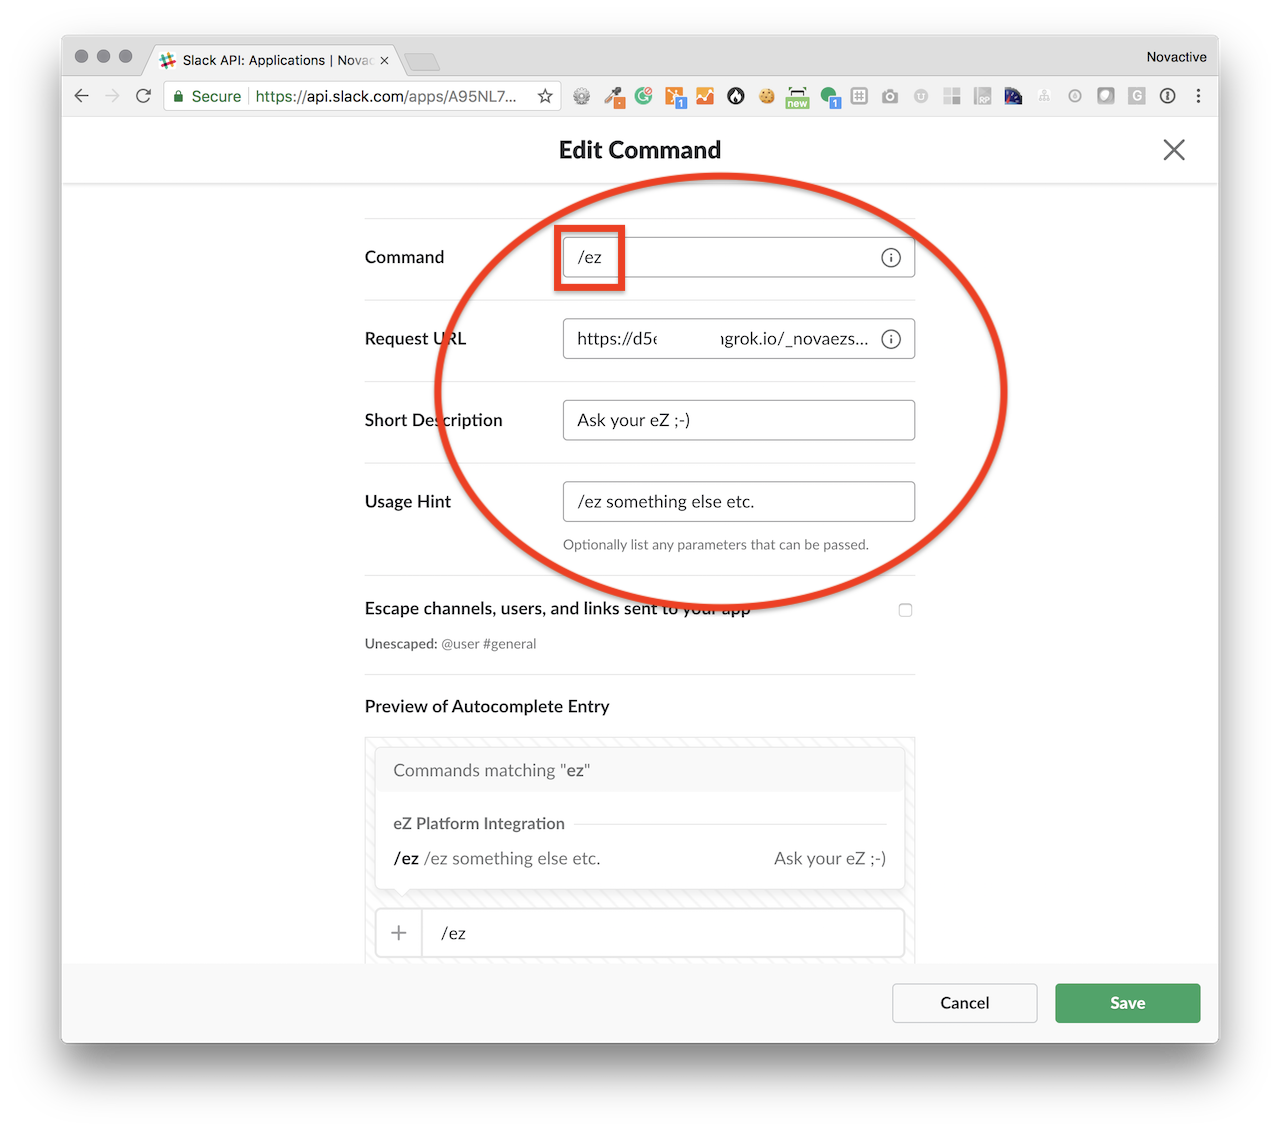
The command /command is up to you, it is not mandatory to use /ez.
For the Request URL, just change the "HOST" in the following, this bundle provides the routes, you should fill in
something like:
https://HOST/_novaezslack/command
OAuth & Permissions
One more step to set the OAuth authentication, on the left "OAuth & Permissions", make sure to provide a valid URL.
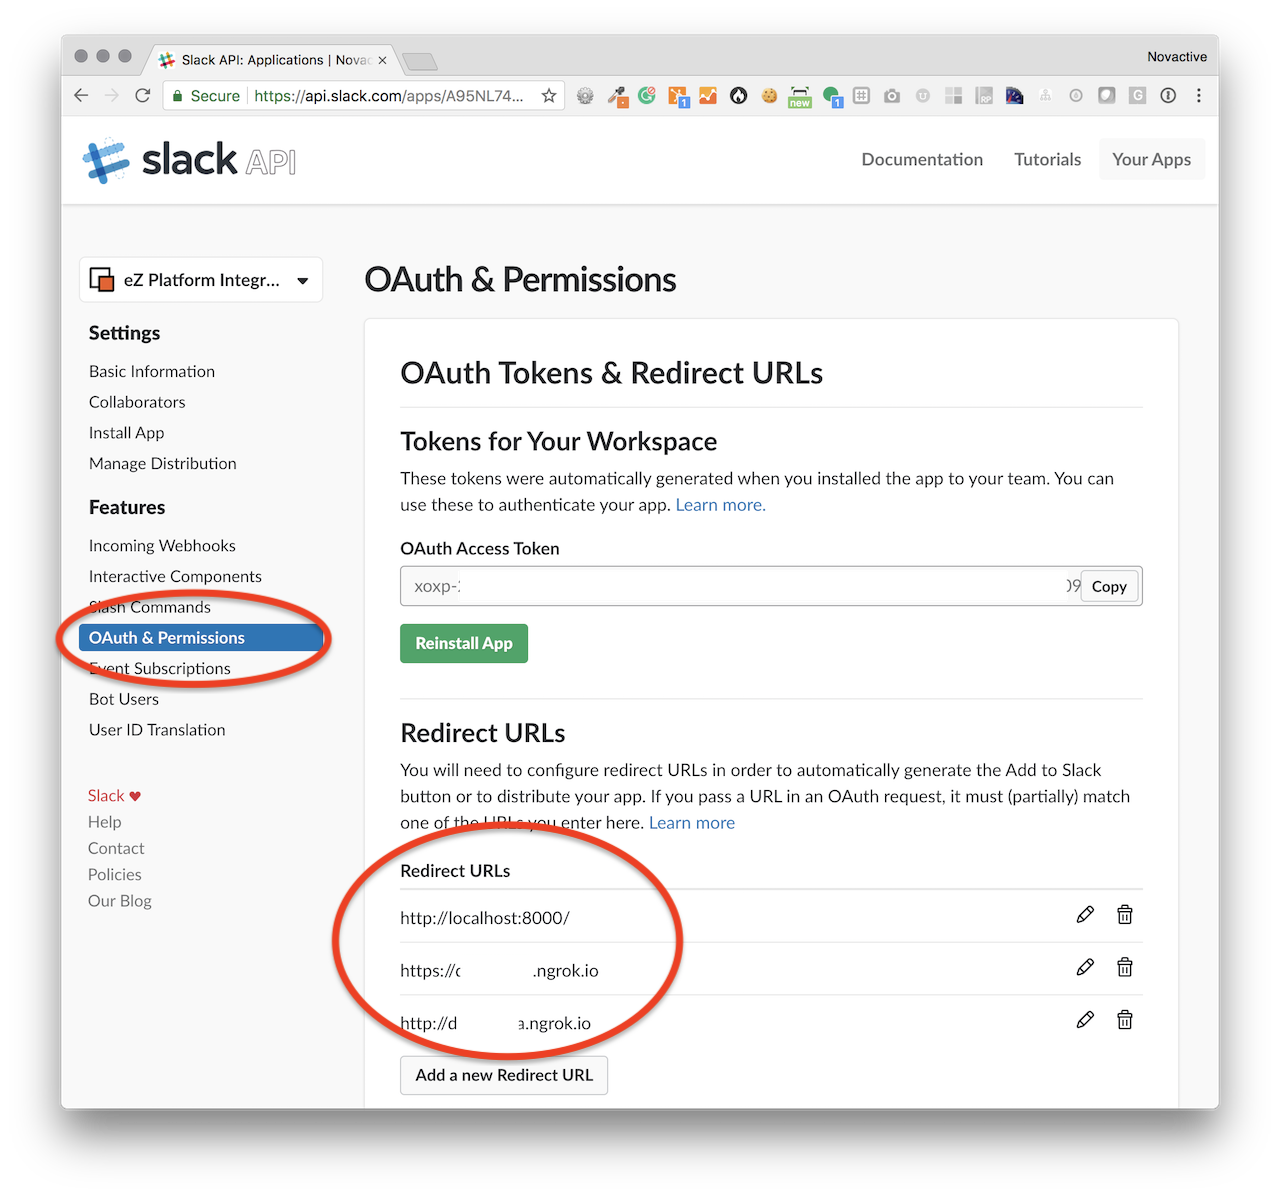
The real callback is https://HOST/_novaezslack/auth/check but you don't want to set that up as you want to manage
multiple SiteAccess then it is fine just to mention the base url here.
Bundle
Add the lib to your composer.json, run composer require novactive/ezslackbundle to refresh dependencies.
Register the bundle
Then inject the bundle in the bundles.php of your application.
    JMS\SerializerBundle\JMSSerializerBundle::class => [ 'all'=> true ],
    KnpU\OAuth2ClientBundle\KnpUOAuth2ClientBundle::class => [ 'all'=> true ],
    Novactive\Bundle\eZSlackBundle\NovaeZSlackBundle::class => [ 'all'=> true ],
If you already have JMSSerializerBundle or KnpUOAuth2ClientBundle do not add them a second time.
Add routes
Make sure you add this route to your routing:
# app/config/routing.yml

_novaezslack_routes:
    resource: "@NovaeZSlackBundle/Controller"
    type:     annotation
    prefix:   /_novaezslack

_novaezslack_slack_oauth_check:
    path: /_novaezslack/auth/check
Add configuration
Make sure you adapt the configuration
# app/config/config.yml

nova_ezslack:
    system:
        default:
            slack_client_id: "SLACK_APP_CLIENT ID"
            slack_client_secret: "SLACK_APP_CLIENT_SECRET"
            slack_verification_token: "SLACK_APP_VERIFICATION_TOKEN"
            site_name: "novactive.us"
            favicon: "https://assets.novactive.us/images/icos/favicon.ico"
            asset_prefix: "https://assets.novactive.us"
            notifications:
                channels:
                    - "https://hooks.slack.com/services/XXXX"

knpu_oauth2_client:
    clients:
        slack:
            type: slack
            redirect_route: _novaezslack_slack_oauth_check
            client_id: "#" # will be overridden by ConfigResolver - this value does not matter
            client_secret: "#" # will be overridden by ConfigResolver - this value does not matter
Add a Guard Authenticator to your Firewall
In order to enable the Slack Connect you need to change your Firewall
# app/config/security.yml

        ezpublish_front:
            guard:
                authenticators:
                    - Novactive\Bundle\eZSlackBundle\Security\SlackAuthenticator
Add Rebuild the CSS etc.
A simplication to run all the good commands (assets, dumps etc.).
composer install
Awesome! Your are done!

 Nova eZ Platform Bundles


